This post may contain affiliate links.
When I first moved into this house, it was the beginning of December. I got to decorate for our first Christmas here, then plan out the garden for our first spring, grow our first little vegetable patch, and hang out on our (dilapidated, eventually torn down) deck throughout our first summer. And then, finally, after ten long months, fall arrived. My first fall in my very own house! I was so excited to finally have a chance to decorate, and I knew I just had to make a wreath for the front door. Now don’t laugh. I’m reasonably sure that this wreath looked pretty good when I first made it. Like, I don’t remember being embarrassed that I was hanging this on the door. I’m like 99% positive that years of moving it in and out of the shed is the reason it looks like… this:

It’s barely even a circle anymore! I excitedly went out to the shed a couple of weeks ago to bring this old gal back to the front door where she belongs, and I hung it up, and I realized she is in major need of some sprucing up.
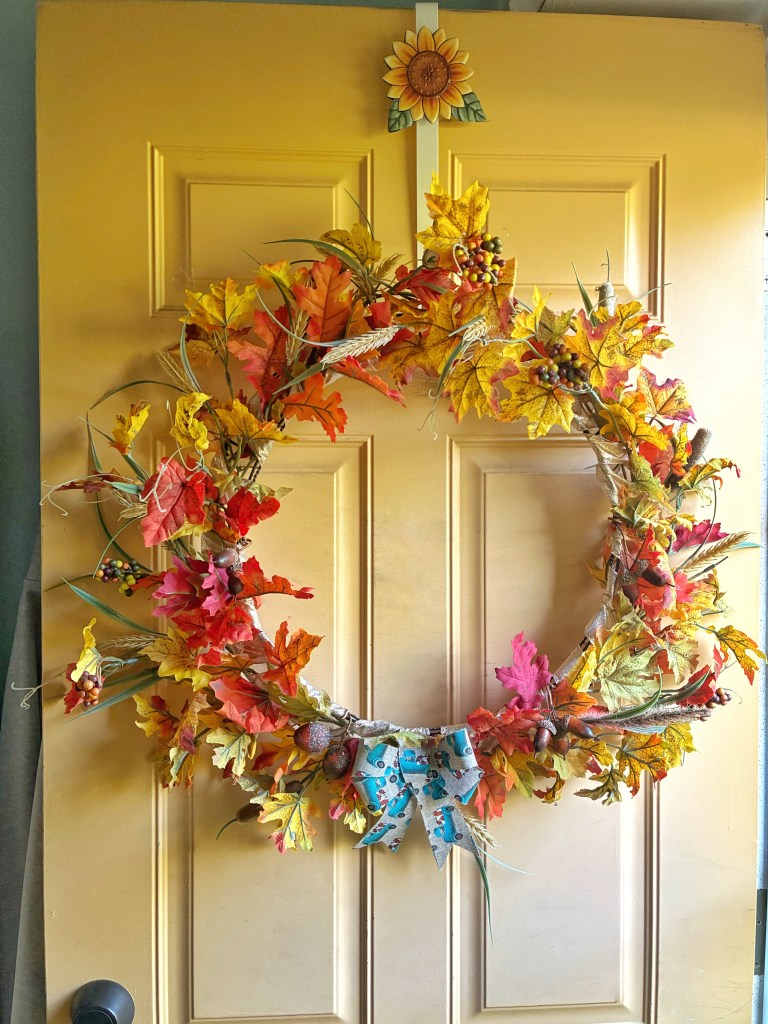
Now that’s better! I gave this wreath a makeover, and below I show you how I did it. But if you don’t have a sad old droopy fall wreath, you can still follow along and learn how to make your own wreath the right way from the start!
What You’ll Need
- Faux fall leaf branches. You can find these as single stems (like this) or as bushes (like this) which you’ll cut down into individual stems. I got mine at Michael’s, but dollar stores are also a good place to look for these.
- A wreath frame. This one is slightly different from the one I used, but the most important thing is to have a frame, and not a single hoop of wire.
- Wire-edge ribbon in whatever color you like. I chose gold because it’s what I had on hand, but you’ll want something that blends into the background of the leaves you choose. Green, reds or oranges, or even a burlap might look nice. You’ll want it to be a width of about 1.5″.
- I used a pre-made bow from the dollar store for the bottom of my wreath. This is optional. You can also use the wire edged ribbon to make a bow yourself, if that’s something you prefer!
- Some floral wire
- Wire cutters. Either floral wire cutters or jewelry wire cutters will work.
Let’s Get Started
As I said, I was starting with an old wreath that I had made many years ago, which had seen better days. So, the first thing I needed to do was pull all of the leaves off of the form. What I was a 16″ black wire wreath form that was decorated with black tinsel pieces.
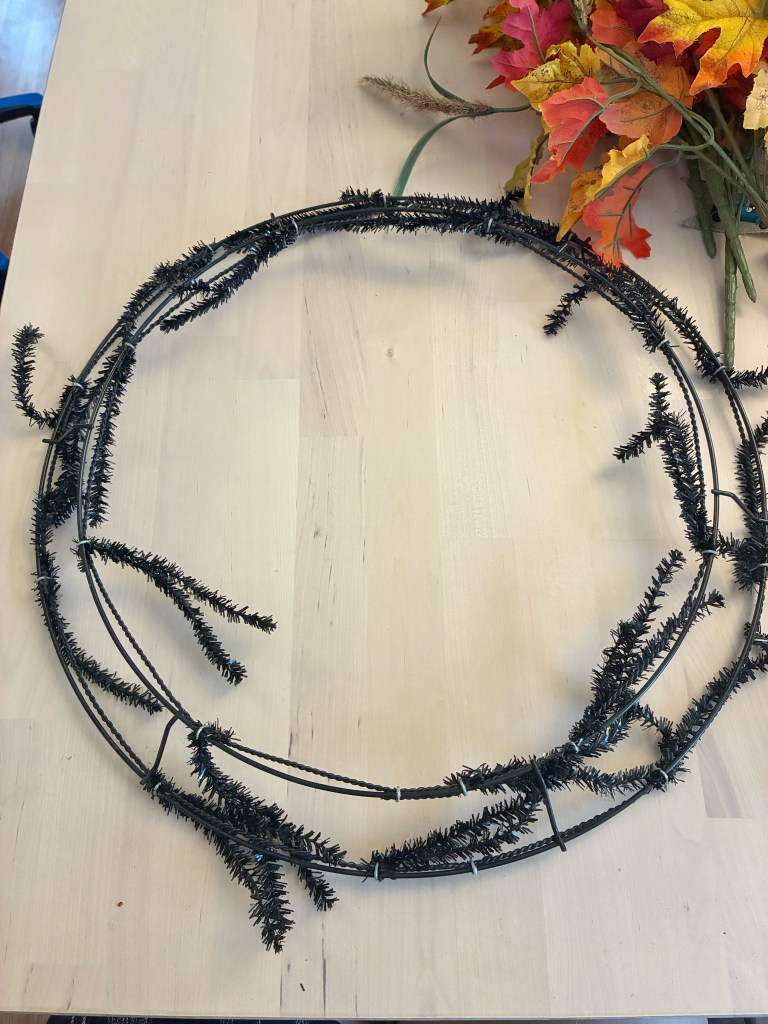
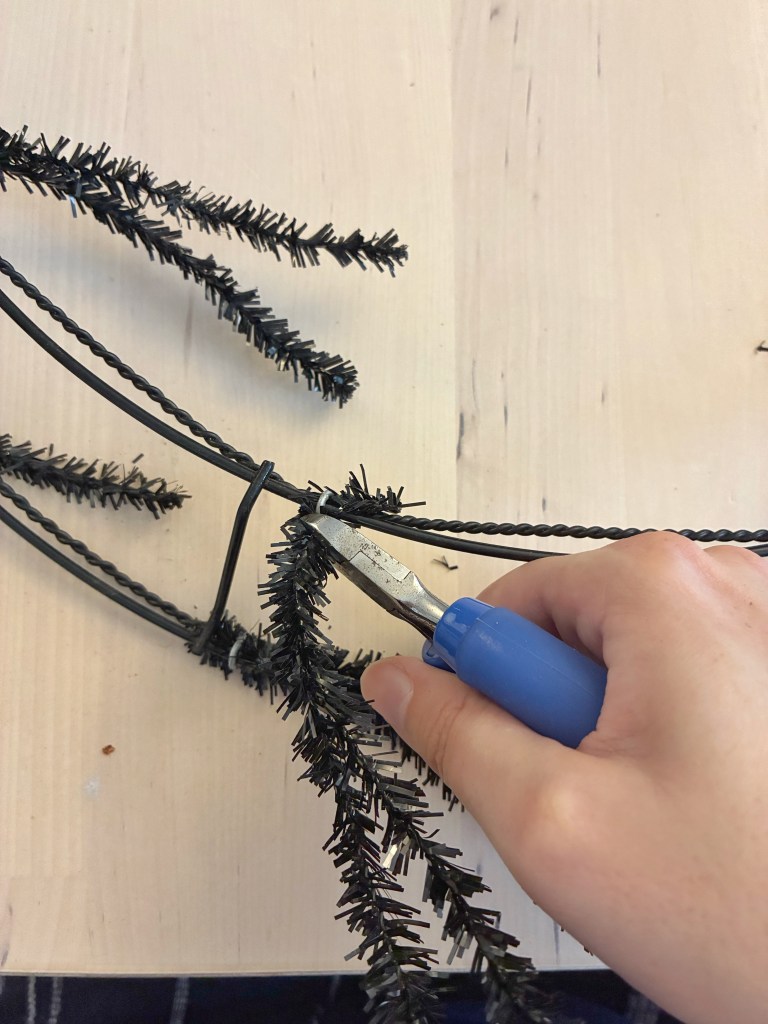
I had originally intended to use this wreath form for both fall and Halloween. My plan had been to pull the leaves off at the end of September and then add some Halloween florals in October. But that was … not my best idea! Like, did I really think that I’d keep pulling this wreath apart over and over every single year (and twice a season – I’d certainly want something for fall again in November when Halloween was done)? I ended up buying another wreath form and making a dedicated Halloween wreath anyway. Since I was no longer going to make my life harder by constantly remaking a wreath, I didn’t really need this tinsel anymore, so I just snipped it off with my wire cutters.
The rest of the wreath was made up of five of these fall leaf bushes. Each one had five individual stems that are held together at the bottom. I had originally just wired these bushes to the wreath form as is, but cutting the stems off gives you much more control over the overall look.
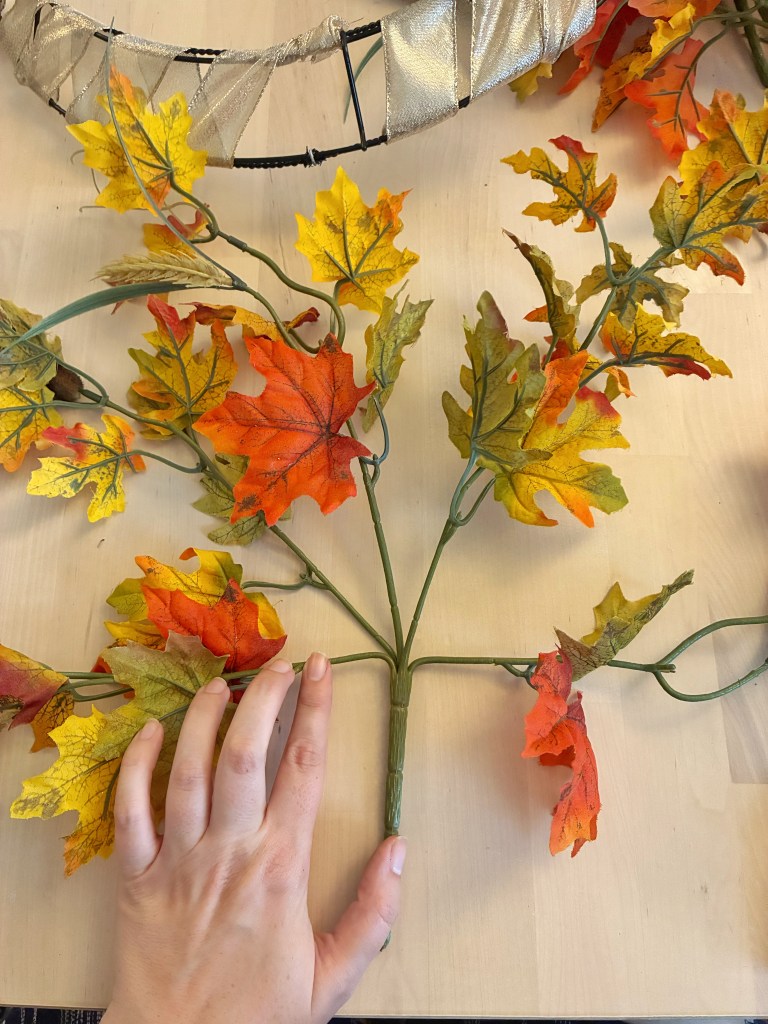
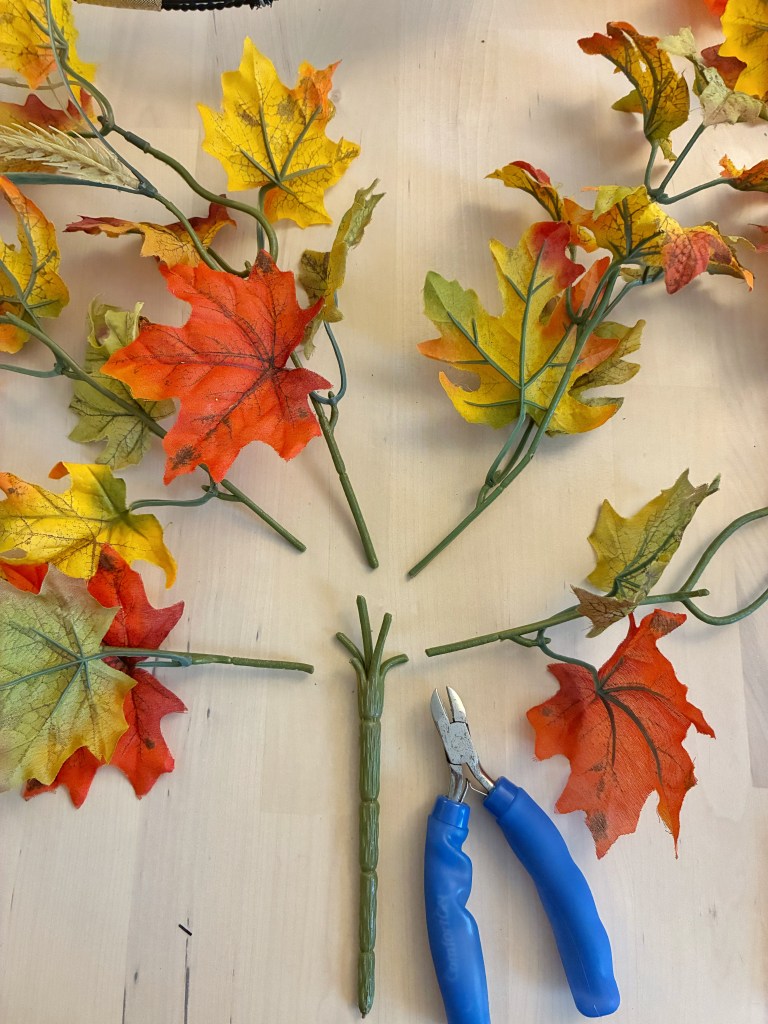
I just pull the stems apart (the wire is very flexible, so they’re easy to move) and then gave them a snip with my wire cutters.
Next, I needed to cover the wreath form with my wired ribbon. I like to leave a space open at the top so that the wreath hook has a space to fit in.
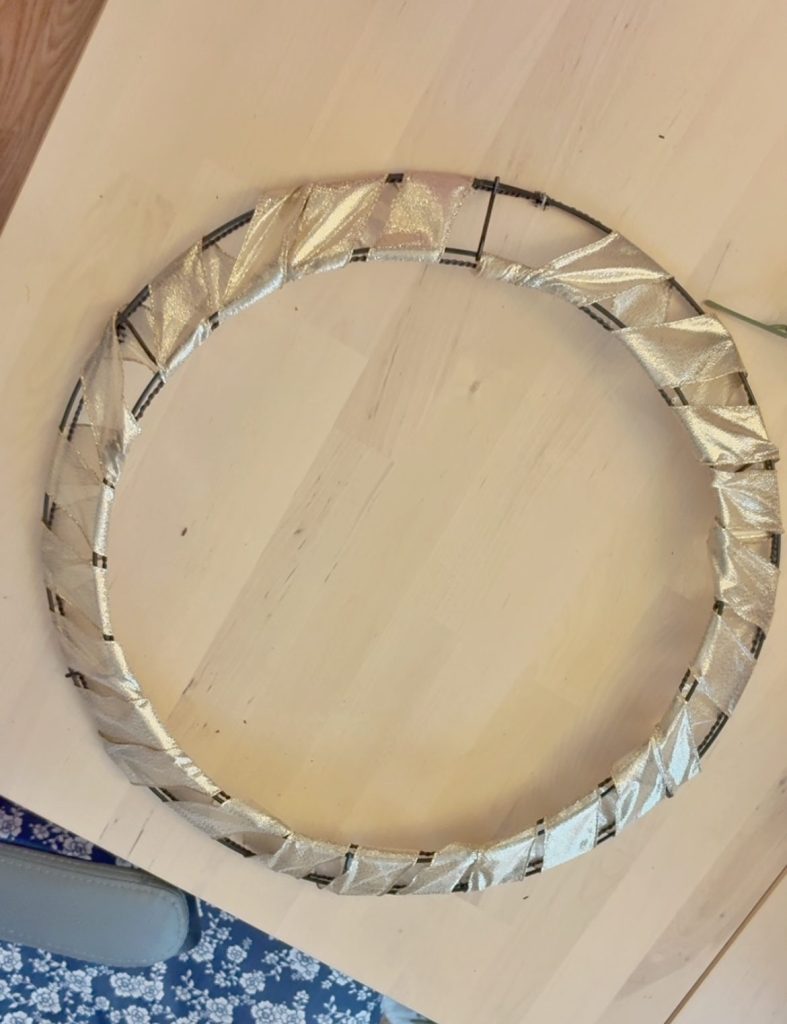
Because the ribbon has a wire edge, it’s very easy to wrap around the form. It holds in place well and there’s no need for glue or anything. Fun fact: I can’t use hot glue on any wreath that sits on my front door because the sun shines on it all morning and heats it up so much that the glue actually re-melts! Some day I will replace that ugly metal door with a beautiful wooden door with a window. But unfortunately that day is not today.
Next it’s time to add the stems! This is a super easy way of putting together a wreath, because all we need to do is slide the stems underneath the loops of ribbon. They’ll stay fairly secure as you go along. If they’re poking out the back, don’t worry about it. We’ll fix that later.

Start at the bottom of the wreath and add your stems in one direction going around to the top. When half of the wreath is done, go back down to the bottom and start sliding the stems in the opposite direction around the second half of the wreath.
So at this point, all of your leaves should be tucked into the ribbon. And it’s possible you have some pesky stems poking out of the back of the wreath.
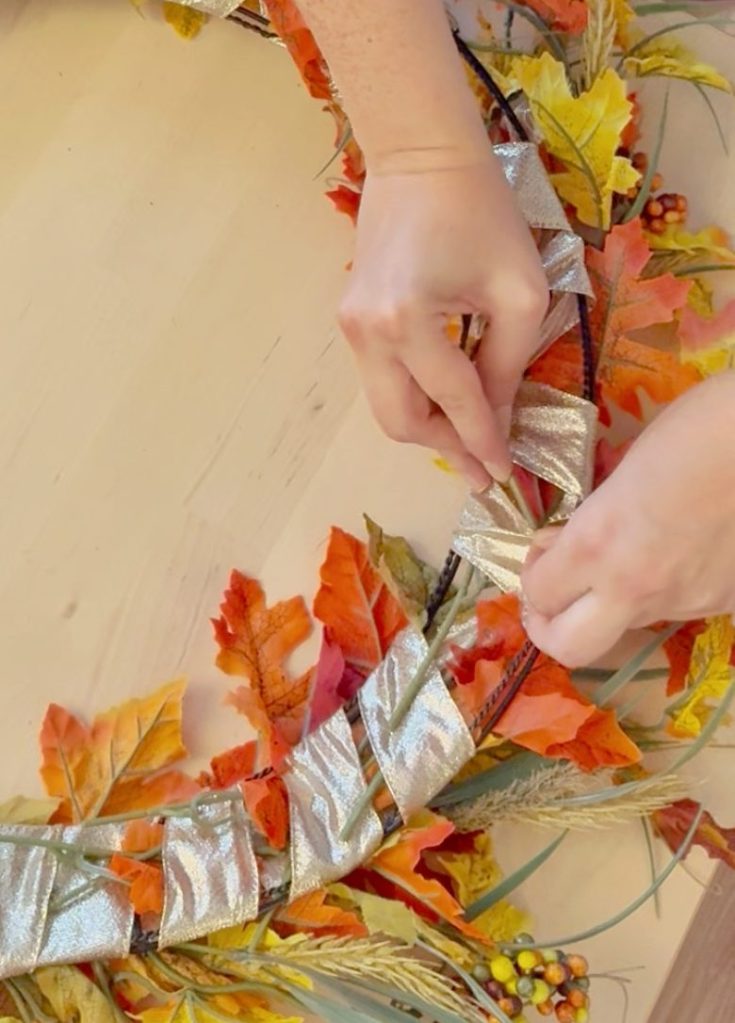
Just take your stems – they bend easily – and slide them under the back loops of the ribbon to hide and secure them.
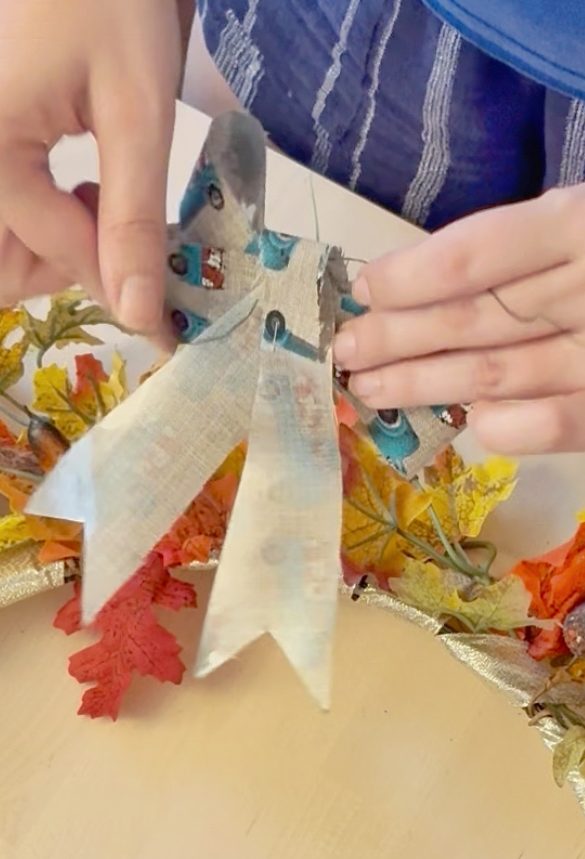
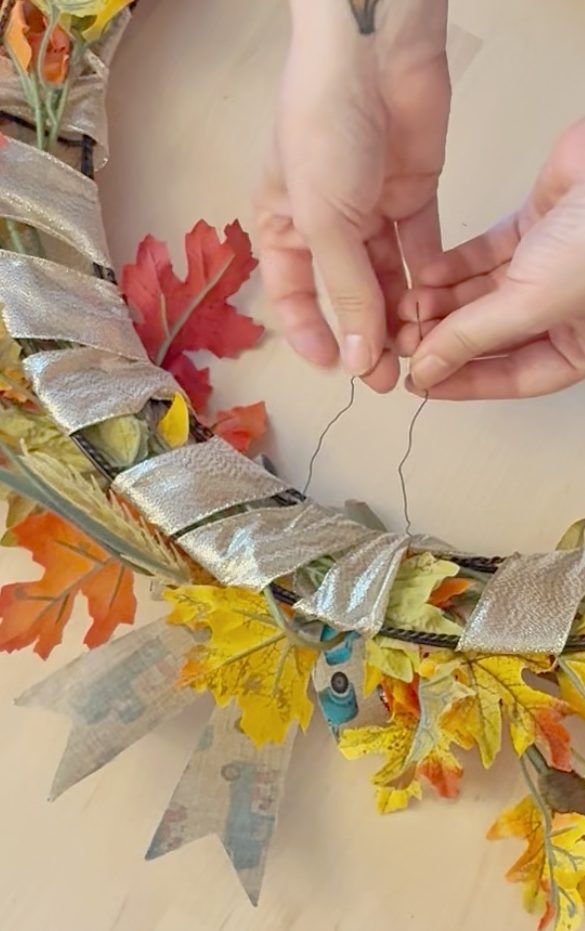
I added this little pre-made bow to the bottom of the wreath. Slide a piece of floral wire into the loop of the bow and set it in place. You’ll slide those ends of the floral wire through the wreath form and to the back. Then flip the wreath over, pull the floral wire tight, and twist it to secure. You can hide the ends of the wire under one of the ribbon loops.
Done!


Leave a reply to Protyus A. Gendher Cancel reply