
I love going to Home Goods and At Home and Michael’s when Halloween is upon us and taking a look at all of the exciting new decorations that they have in store. But, alas, I’m not made of money and can’t just blindly fill my cart with everything (as much as I want to live out those “you just won a Toys R Us shopping spree” dreams of my youth), and I have a sneaking suspicion that you may not be either. So, instead, we stay in budget, if only to be able to afford tomorrow’s fancy coffee, and we make the things that we can’t afford!
Today I have a really fun Halloween planter/vase for you, and the best part is that it’s made entirely of items from the Dollar Tree! Maybe you don’t have a Dollar Tree near you, but if you have a different type of dollar store or a Walmart, you’ll probably be able to find versions of these items.
The tutorial is below, or you can see a video version here!
What You’ll Need


From the Dollar Tree:
- Plastic skull from the Halloween section
- Bag of decorative stones (the color/style doesn’t matter) from the floral section
- Floral foam from the floral section (if they don’t have the small circles, get a larger block and cut it down to size using a serrated knife)
- Five bunches of fake flowers (any type you like – get creative with what will match your style and decor!)
From your craft supplies:
- An x-acto/utility knife and a pair of craft scissors
- Optional: hot glue gun
- Optional: metallic craft paint and a paint brush
Let’s Get Started
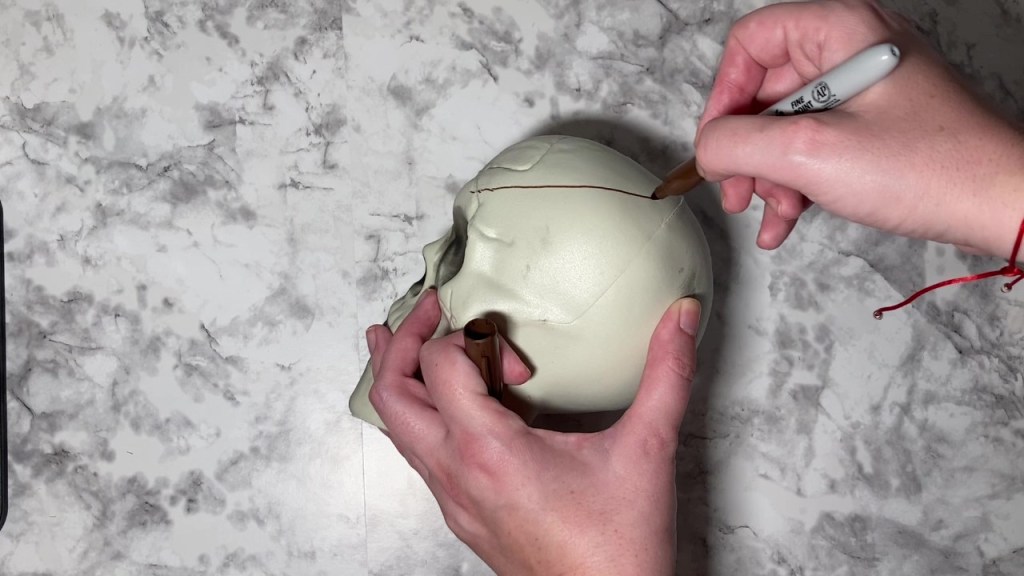
First, you’ll need to cut the top off the skull. Set the skull on a flat surface and then draw a straight line parallel to the flat surface with a Sharpie. You’ll cut along that line with an x-acto or utility knife. It’s pretty easy to cut through the skull, but if you’re not comfortable using a knife, you can switch to a pair of scissors to finish the job.
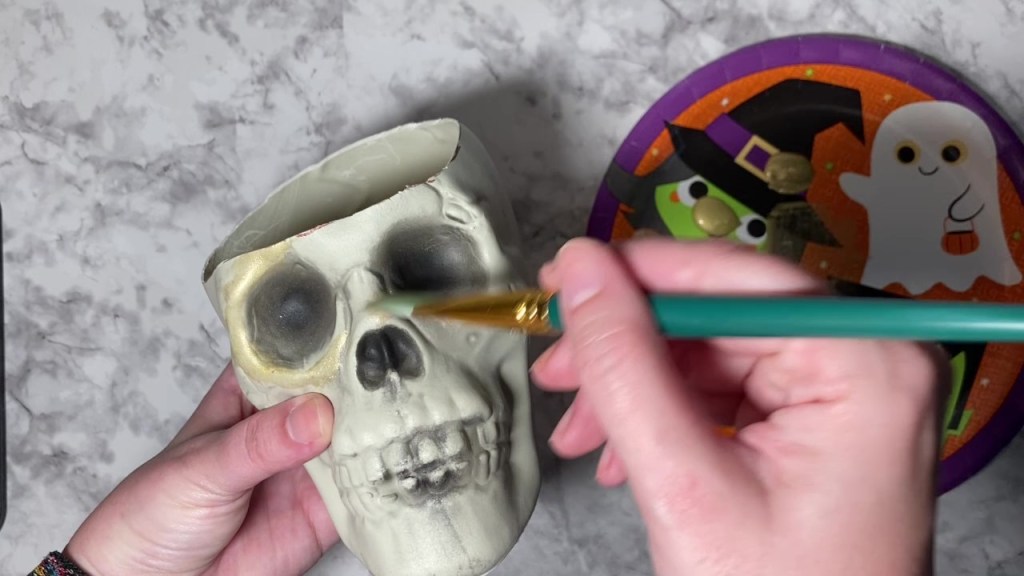
Next, I did some dry brushing with different gold metallic craft paints to give the skull an old, gilded appearance. To dry brush, you’ll wet your brush to soften the bristles, but then dab the water off on a paper towel. Then, add a small amount of paint to your brush and dab most of it back off before lightly tapping, rubbing, or stippling the paintbrush over the surface of the skull. This part is optional!

To give the skull some stability, we’ll use that bag of decorative stones and fill the entire cavity with it.
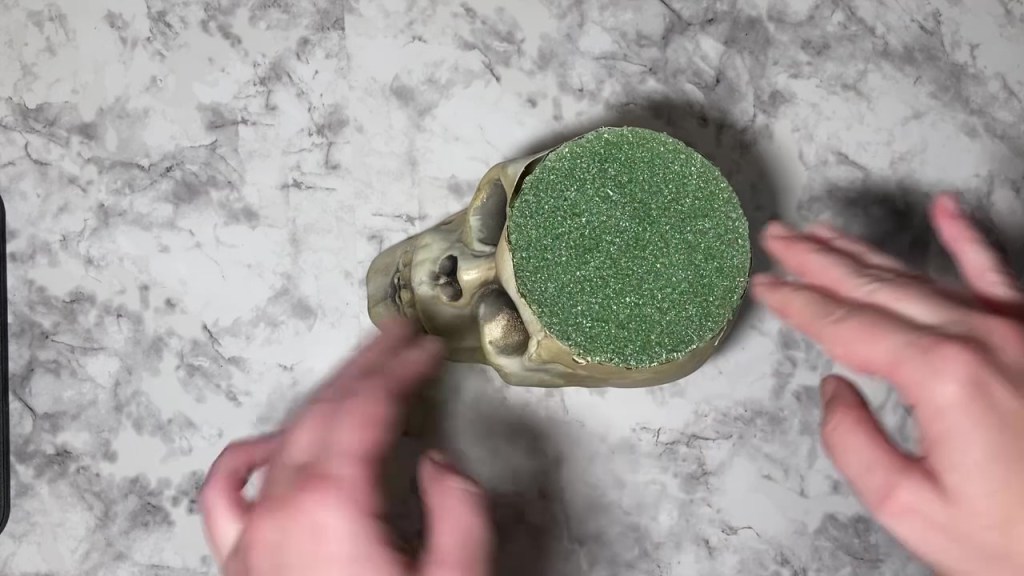
Next, add your floral foam. As an optional step, you can add some hot glue to the bottom of the foam and around the edges where it meets the interior of the skull.
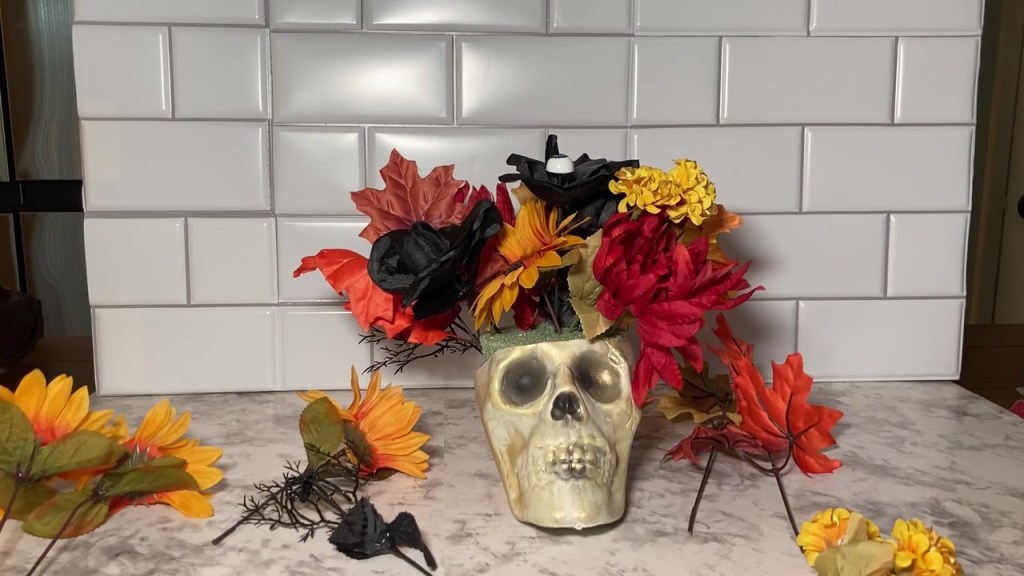
Check out my post on how to work with Dollar Tree flowers here, which will help you get started with your arrangement! Make sure you turn the skull around as you work so you cover all of the exposed floral foam as well as the edges of the skull. Arrange your flowers in whatever way looks best to you – this is your chance to really get creative!

Once you’re done arranging, you may notice some flowers overhanging the face of the skull. You can use a pair of scissors to give it a little “haircut” and shape everything up nicely. And that’s that! You can remove your flowers and rearrange them throughout the season if you like.
Check out the video tutorial below!


Leave a comment